

Wood artwork ideas can transform blank walls into warm, textured focal points using accessible tools and simple techniques. If you’re searching for practical, inspiring wall wood decor DIY projects with clear steps, material lists, and finishing tips, this guide walks you through everything from beginner pallet art to routed wooden signs.
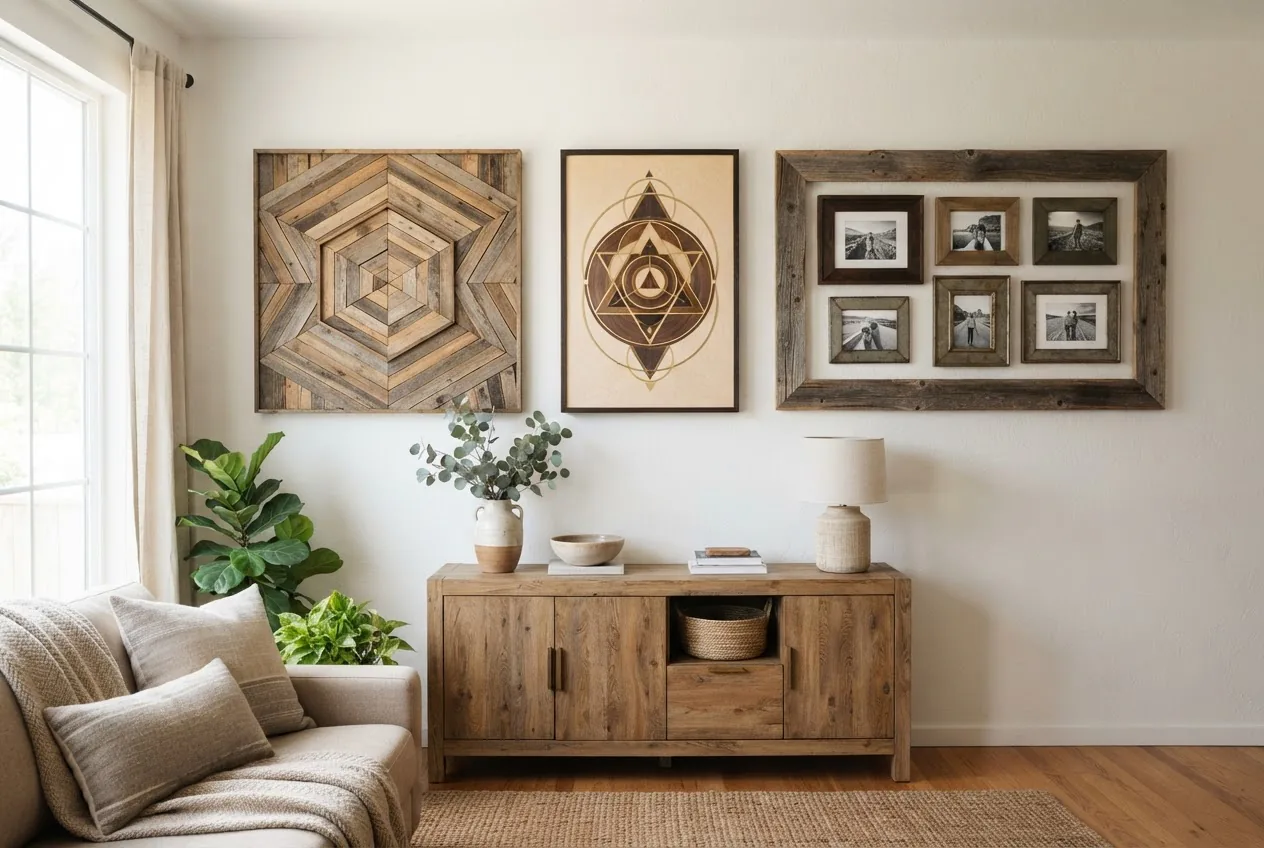
DIY bedroom decor projects and easy ideas
Introduction to Wood Artwork Ideas for Wall Decor
Wood wall art offers a tactile alternative to canvas and metal pieces, adding warmth and natural texture that suits a wide range of interior styles—rustic, modern, boho, or geometric. This comprehensive guide focuses strictly on wood as the primary medium: creative wood crafts that are practical, repeatable, and ideal for bedroom and home decor projects.
Start by choosing a style and scale that match your room’s dimensions and aesthetic. Small, framed plank collages work beautifully above bedside tables, while larger multi-panel geometric installations make a striking impact in living areas. Emphasize wood’s natural grain or introduce color with stains and artfully controlled paint accents to create engaging contrasts.
To complement this guide, explore wider interior advice and related project ideas. For room-wide styling context and tips that pair perfectly with wood art, see practical home styling tips and DIY projects and craft ideas for your room.
Transition: With an understanding of how wood art complements your space, let’s cover the essential tools and materials you’ll need to create your pieces safely, efficiently, and beautifully.
Essential Tools and Materials for DIY Wood Artwork
Gathering the right supplies not only accelerates your projects but greatly enhances the quality of the finished pieces. Below is a detailed list of essential tools, material options, and safety equipment—along with cost guidance and selection tips.
If you’re starting out on a budget, many pieces can be completed with a minimal toolset; consider borrowing or renting specialty tools like a router or planer for a single project rather than buying outright. Investing incrementally in a core set (saw, sander, drill, clamps) covers most beginner and intermediate projects.
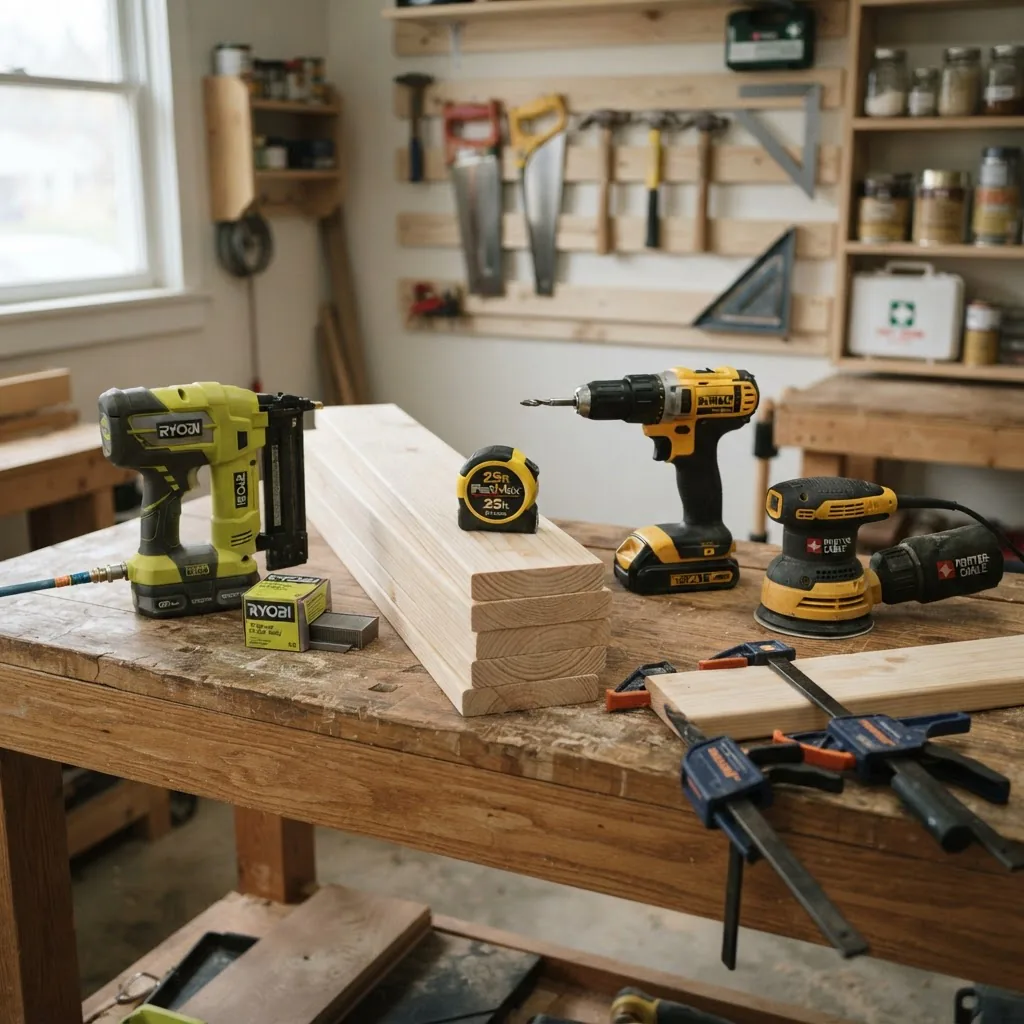
- Saws — Circular saws and jigsaws offer versatile cutting options for planks and intricate shapes. A miter saw saves time on repeat angled cuts. Tip: when cutting plywood, use a guide rail or straightedge to minimize tear-out and ensure clean cuts.
- Sanders — An orbital sander is perfect for smoothing broad surfaces; a detail sander helps with tight corners and edges. Begin with 80–120 grit sandpaper to remove mill marks and roughness, then finish with 180–220 grit for a smooth base ready for sealing or painting.
- Drills and drivers — A cordless drill/driver simplifies making pilot holes and driving screws quickly. Include a range of wood drill bits and countersink bits to help prevent splitting near edges.
- Nail guns and brad nails — An 18-gauge brad nailer effectively attaches thin strips or trim with minimal visible holes. For sturdier assemblies, opt for finish nails or screws.
- Clamps — Bar clamps and corner clamps are essential for holding pieces square while glue dries. Using sacrificial cauls under clamp pressure helps distribute force evenly and avoid marks.
- Hand tools — A combination square, tape measure, carpenter’s pencil, utility knife, and chisels are indispensable for precise layout, marking, and cleaning joinery.
- Adhesives and joinery — Wood glue (PVA) is the standard for most joins; epoxy is recommended for exterior or moisture-prone projects. Dowels, pocket screws, and biscuits provide added joinery strength and alignment.
- Finishing supplies — Stains, water-based and oil-based polyurethanes, brushes, foam applicators, tack cloths, and painter’s tape are fundamental. Select finishes based on desired sheen, durability, and environmental conditions.
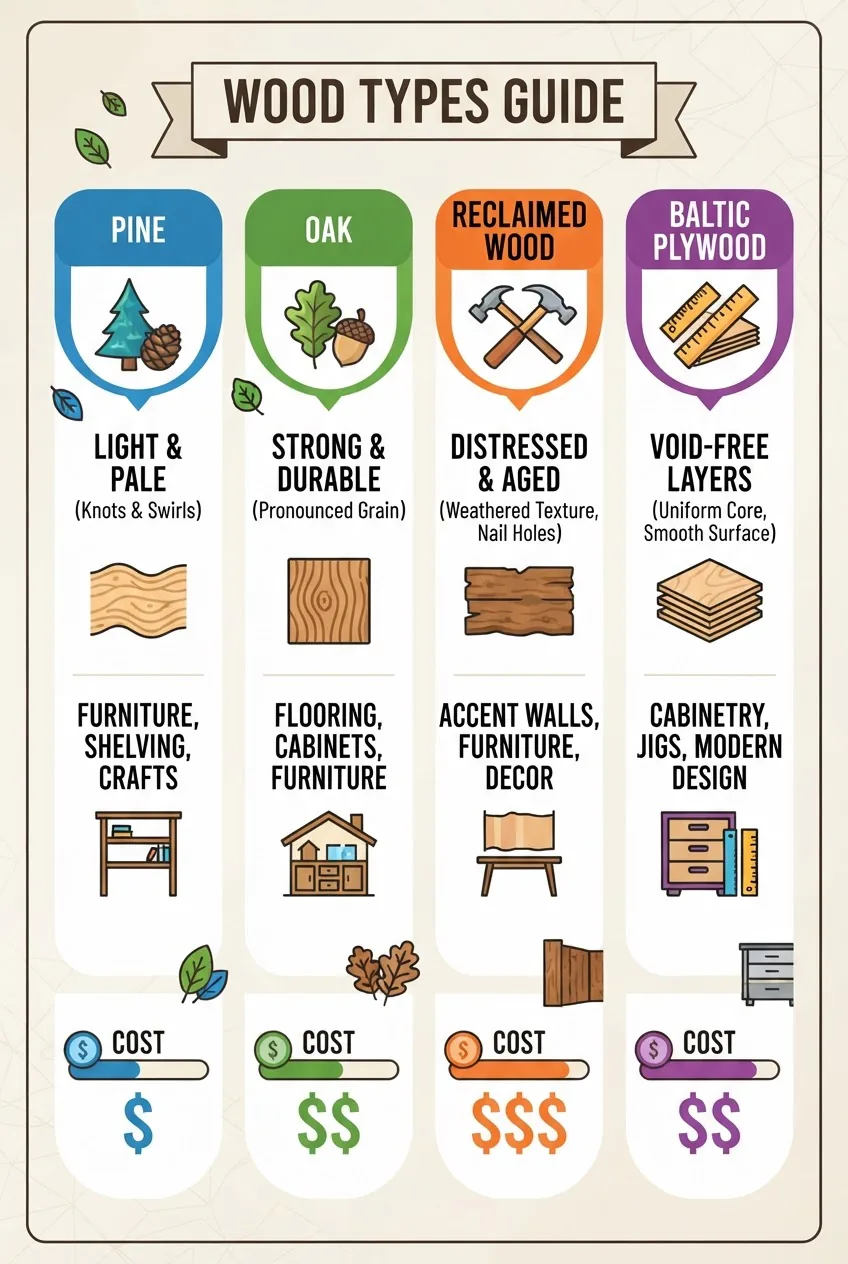
- Types of wood — Pine, oak, reclaimed wood, and plywood are typical choices (details in table below). Choose based on wood grain, stability, availability, and budget.
- Safety equipment — Safety goggles, hearing protection, dust masks or N95 respirators, and work gloves. Always follow occupational safety guidelines; see the external woodworking safety standards link below for comprehensive regulations and best practices.
- Optional power tools — A router for decorative edges and inlays, planer for leveling boards, and scroll saw for detailed cuts add advanced capabilities.
- Measuring and layout aids — A level, laser measure, and marking gauges improve alignment accuracy and hanging precision.
- Consumables and hardware — Sandpaper, screws, anchors, D-rings, French cleats, picture hanging hardware, and finishing rags are essential for assembly and final presentation.
- Reference plans — To scale up into furniture or complex joinery later, consult detailed blueprints. wood furniture blueprints and plans
Below is a quick comparison table highlighting common wood types used in wall art to help you choose the best material for your project.
| Wood Type | Look & Grain | Cost | Best Uses |
|---|---|---|---|
| Pine | Light color, visible knots | Low | Painted panels, rustic plank decor |
| Oak | Pronounced grain, warm amber tone | Medium–High | Durable framed pieces, veneer projects |
| Reclaimed wood | Weathered texture, rich character | Variable | Rustic gallery walls, accent feature panels |
| Plywood (Baltic/hardwood-grade) | Stable, smooth faces | Low–Medium | Geometric panels, inlays, cut shapes |
Safety and standards: always consult governing safety guidance for tools and workshop practices. For government woodworking safety standards and personal protective equipment (PPE) recommendations, see OSHA: Woodworking safety.
Transition: With tools and materials ready, let’s explore popular design styles so you can select projects that fit your home’s unique vibe.
Popular Wood Artwork Styles and Design Ideas
Wood artwork embraces a variety of design directions to match different tastes and interiors. Below are core styles with illustrative mini-galleries—examples and styling suggestions for bedrooms and other living spaces.
Rustic wood decor: Characterized by reclaimed planks, live-edge slices, and distressed finishes. Mini-gallery: a horizontal plank gallery above a bed using alternating plank widths and matte finish; a live-edge slab mounted with hidden cleats as a custom headboard accent. Pair these with natural linens and warm, layered lighting for cozy bedroom vibes.
Modern wood artwork: Features clean lines, geometric panels, and smooth finishes. Mini-gallery: staggered plywood panels painted in muted tones like soft gray or dusty blue, mounted with concealed floating cleats; narrow wood slats assembled into a chevron pattern with a clear satin seal. For more sharp-lined modern inspiration, see modern DIY wall decor inspiration.
Boho style wood decor: Combines mixed textures, layered shapes, and natural earthy tones. Mini-gallery: thin wood discs clustered with leather hangers; dowel-and-slatted wood wall hangings accented with macramé. Combine with plants and woven textiles to create a relaxed, eclectic atmosphere. For boho styling tips, see boho DIY styling tips.
Geometric wood wall art: Uses layered shapes and precise cuts to form bold compositions. Mini-gallery: a three-panel triangular setup using birch plywood with staggered depths; a hexagonal honeycomb of small wooden tiles finished with varying stains for striking contrast.
Reclaimed wood projects: Highlight authenticity by retaining old nail holes, weathered textures, and natural aging. Mini-gallery: a large reclaimed plank map silhouette of a state or country, optionally backlit with subtle LED lighting; family photos framed in rustic reclaimed wood boards.
Seasonal and themed ideas: For fall décor, consider an autumn plank sign featuring carved leaf motifs or a natural wood wreath plaque. For more inspiration, see easy autumn decorating ideas.
Bedroom-focused placement tips: For above-bed artwork, center a medium-sized piece (24–36 inches wide) at eye level, typically 6–9 inches above the headboard. Combine wood art with soft textiles and low-glare lamps to balance texture and visual weight. For wider wall arrangements, consult easy wall decor ideas.
Transition: Ready to craft your own? The next section details three to four hands-on projects, complete with materials lists, step-by-step instructions, safety reminders, and finishing tips for flawless results.
Step-by-Step DIY Wood Artwork Projects for Wall Decor
Project 1 — Pallet Plank Geometric Wall Panel (Beginner)
This project transforms pallet or reclaimed wood into a striking geometric panel, ideal for beginners. It requires mostly hand tools and keeps costs low, especially if you reuse materials.
Materials & tools:
- Reclaimed pallet boards or kiln-dried pine planks (approx. 24–30 linear feet depending on panel size)
- Plywood backing sheet (1/4″ or 3/8″ thickness) cut to final panel size (e.g., 24″ x 36″)
- 18-gauge brad nails or 1″ finishing nails and PVA wood glue
- Orbital sander (80–180 grit), tape measure, speed square, carpenter’s pencil
- Brad nailer or hammer, clamps
- Wood stain or water-based sealer, foam brush, tack cloth
- Hanging hardware: French cleat or two D-rings with picture wire
Estimated time & cost: 4–6 hours active work; $30–$80 (minimal if reclaimed wood is sourced free).
- Design layout: Sketch your desired geometric pattern—chevron, diagonal stripes, or stacked rectangles. Measure the plywood backing and mark precise guide lines for accurate plank placement.
- Prepare boards: Remove any nails, cut boards to length with a circular or miter saw. Smooth faces with orbital sander; for reclaimed wood, retain natural texture selectively for character. Wear an N95 respirator when sanding.
- Dry-fit: Arrange boards on the backing panel to confirm design alignment. Adjust plank widths and edges using a jigsaw if creating tapered shapes.
- Glue and fasten: Apply wood glue to the plywood along each board’s seating line, press boards firmly in place, clamp, and secure with brad nails every 8–10 inches. Wipe off any glue squeeze-out promptly with a damp cloth.
- Trim and sand edges: After glue curing per instructions, trim any overhang and sand panel edges flush for a clean finish.
- Finish: Apply stain selectively for contrast or use a clear matte sealer. Wipe on thin coats with a cloth to avoid lap marks; if using water-based polyurethane, sand lightly with 220 grit between coats for smoothness.
- Mounting: Attach a French cleat system on the back—longer cleats distribute weight evenly and simplify leveling. On drywall, use wall anchors rated for the artwork’s weight. Refer to mounting tips in the finishing section below.
Safety notes: Always wear eye protection and a dust mask during cutting and sanding. When using reclaimed wood, inspect for embedded nails, decay, or pests, and treat accordingly.
Project variations: Add painted accent stripes on select planks for modern contrast—see practical DIY painting techniques for clean painting on wood.
Project 2 — Layered Modern Plywood Panel with Inlay (Intermediate)
This project produces a crisp, contemporary design featuring layered Baltic birch plywood with routed inlay accents. It introduces precise joinery, router operation, and multi-layer assembly for sophisticated visual depth—perfect for living rooms or entry spaces.
Materials & tools:
- Baltic birch plywood (3/8″ or 1/2″) for top and base panels; 3/4″ plywood or solid lumber for internal spacer frame
- Router with straight and rabbeting bits, jigsaw
- Wood glue, pocket screws, clamps, brad nails
- Stain or water-based varnish; painter’s tape for sharp color boundaries
- Rubber mallet, sanding pads (120–220 grit)
Estimated time & cost: 8–12 hours total; $80–$250 depending on plywood grade and tool rental costs.
- Plan and cut panels: Draft multi-layer layout—such as a large base panel with a smaller raised rectangle on top. Use a circular or table saw to cut base and top panels to size.
- Route inlay groove: On the top panel, use a router to cut a shallow groove designed to seat a thin contrasting wood strip or paint insert. Employ a straightedge guide for clean, straight cuts. For detailed router safety, visit Woodworkers Guild of America.
- Build spacer frame: Construct a 1/2″ thick spacer frame from 3/4″ stock that raises the top panel above the base, creating depth. Attach the frame to the base panel using pocket screws.
- Assemble and glue: Apply glue to the spacer frame edges, align the top panel, clamp securely, and fasten with brad nails as needed. Clean excess glue promptly.
- Finish: Fill router tear-out spots with fine wood putty if necessary. Apply a smooth semi-gloss water-based finish for modern brilliance; lightly sand between coats for a flawless surface.
- Mount: Use a continuous French cleat along the top half of the back for firm and flush wall mounting. For large panels, see installation tips for large walls for proper securing.
Safety and advanced tips: Route in multiple shallow passes to minimize tear-out. Always wear hearing protection and use push blocks for safety. If routing is new to you, explore video tutorials from expert sources like the Woodworkers Guild above.
Design options: Incorporate thin brass or painted inlay strips for added interest. For modern painting techniques on wood surfaces, see contemporary painting techniques for DIY.
Project 3 — Framed Plank Photo Gallery (Beginner–Intermediate)
Create a custom photo gallery wall using simple wood frames and plank strips. This project blends framing skills, basic joinery, and careful layout, making it a great bedroom centerpiece or personalized gift.
Materials & tools:
- Plank strips (1×3 or 1×4) or pre-cut molding for frames
- Plywood backing panels, clear acrylic or glass glazing, picture hanging hardware
- Brad nails, wood glue, corner clamps, miter saw
- Optional: routed lettering or laser-cut wooden motifs for decoration
Estimated time & cost: 3–8 hours, depending on quantity of frames; $40–$150.
- Choose sizes and layout: Decide on a uniform grid or eclectic salon-style arrangement. Use a floor layout or kraft paper cutouts taped to the wall to finalize placement.
- Cut and assemble frames: Miter cut frame members at 45°. Use wood glue and corner clamps for assembly reinforcement, fastening with 1″ brad nails. For larger frames, consider dowels or pocket screws for stronger joints.
- Prepare backing and glazing: Cut plywood or MDF backing to fit inside frames. Insert photos behind acrylic or glass sheets, securing with small brackets or flexible frame points.
- Finish frames: Use stain or paint. For painted accents, tape edges carefully for clean lines using techniques from simple canvas painting techniques.
- Hang with spacing: Standard spacing between frames is 2–3 inches for cohesion. Use a level and measuring tape to ensure straight lineups. Use two wall anchors for larger or heavier frames for security.
Gift idea: This framed plank photo gallery makes a thoughtful handmade present. For seasonal gifting inspiration, check out handmade gift ideas for Christmas.
Project 4 — Routed Wooden Welcome Sign with Carved Lettering (Intermediate)
Craft a durable, stylish wooden welcome sign featuring routed lettering and a weather-resistant finish. This project introduces template-making, routing techniques, and outdoor sealing methods.
Materials & tools:
- 1×8 or 1×10 cedar, redwood, or exterior-grade plywood sign blank
- Router with lettering bits or CNC routing service for precise cuts
- Exterior-grade wood glue, corrosion-resistant screws, spar varnish or outdoor sealer
- Masking film or vinyl stencils (optional) for painting recessed letters
Estimated time & cost: 6–10 hours; $60–$200 depending on routing method and tools.
- Design and template: Create lettering in vector software or hand-draw. For consistent precision, use vinyl stencils or routed templates.
- Cut sign blank: Trim wood to size, sand smooth. Ensure solid wood pieces have stable moisture content to avoid warping.
- Route lettering: Secure blank, use router to carve letters by following template or bit. Use multiple shallow passes to reduce tear-out.
- Paint or stain letters: Carefully paint recessed lettering. Remove tape or stencil while paint is tacky for crisp edges.
- Seal for outdoors: Apply UV-resistant spar varnish or exterior-grade finish in several coats, sanding lightly between coats for durability.
- Mounting and placement: Pre-drill and use stainless-steel screws for porch installation. For indoor display, use D-rings or French cleat hangers for a flush, secure mount.
Resources: For additional sign-making techniques and templates, visit wooden sign making tips and templates and DIY welcome sign ideas and techniques.
Safety: Always secure workpieces when routing, use push blocks, and wear eye and hearing protection. For creative hanging like macramé or mixed media, consult handmade wall piece craft techniques and handmade wall decoration tips for innovative compositions.
Transition: With completed projects in hand, focus on finishing and mounting to ensure longevity, protection, and a professional presentation.
Tips for Finishing and Mounting Your Wood Artwork
Proper finishing and mounting protect your wood artwork and enhance its display impact. Below are key tips for durable finishes and balanced hanging.
- Staining vs. painting vs. natural sealants — Staining highlights the grain while preserving a natural look; painting delivers bold color statements; natural oils or water-based polys maintain the wood tone with minimal yellowing. Note: stains soak in and require fewer sealer coats; paints mask grain but often need primer for longevity.
- Finish selection — For bedroom pieces, especially, opt for matte or satin polyurethane to reduce glare. In moisture-prone areas (bathrooms, kitchens), use oil-based or marine-grade spar varnishes for enhanced water resistance.
- Application techniques — Sand to 180–220 grit before applying finishes. Clean surfaces with a tack cloth, apply thin coats, and sand lightly between coats. With oils, allow full cure time and ensure good ventilation.
- Painting wood — Use an acrylic primer on plywood before painting to prevent uneven absorption, then apply flexible acrylic paints indoors. Use painter’s tape to create crisp lines, removing tape while paint is still tacky.
- Sealing reclaimed wood — Clean and degrease reclaimed pieces; apply biocides if pests are suspected. Test finishes on scrap to judge color and absorption.
- Hanging hardware options:
- French cleat — strongest mount, easily leveled, ideal for heavy pieces.
- D-rings with wire — suitable for medium-weight frames; requires careful leveling.
- Keyhole slots — provide flush mounting for lighter panels.
- Toggle or molly anchors — effective for hollow drywall without stud access.
- Mounting process — Measure heights in relation to furniture (align artwork centers at eye level). For living room pieces, place artwork centers approx. 57–60″ from the floor. For large or heavy displays, consult easy living room decor styling tips and installation tips for large walls.
- Hardware quality — Select hardware rated above your piece’s weight. Use rust-resistant metals like stainless steel or brass for humid environments, such as kitchens—see kitchen wall decor ideas.
- Durability tips — Avoid placing wood art near heat sources or in prolonged direct sunlight to minimize warping and fading. Use UV-resistant finishes and consider laminated or stabilized wood for enhanced stability.
Safety standards and materials: Some solvents and oil-based finishes contain VOCs—always follow product label instructions, maintain effective ventilation, and consult government consumer safety guidelines. See OSHA: Woodworking safety for PPE and safe chemical handling recommendations.
Transition: Despite careful work, DIY wood projects may encounter common problems—here’s how to troubleshoot them effectively.
Common Challenges and Troubleshooting in Wood Artwork DIY
This problem/solution guide addresses typical issues in wall wood decor projects and how to fix or avoid them.
Problem: Wood splitting when nailing or screwing near a plank edge.
Solution: Pre-drill pilot holes sized according to screw cores and countersink for a flush fit. Keep fasteners away from edges. For thin planks, use brad nails rather than screws to reduce splitting risk.
Problem: Uneven surfaces or gaps between planks.
Solution: Flatten planks with a jointer or belt sander before assembly. For small gaps, apply color-matched wood filler and sand smooth. Use cauls during glue-up to maintain even pressure and prevent bowing.
Problem: Finish blotching on plywood or softwoods.
Solution: Apply a sanding sealer or thin shellac coat to smooth absorption before staining. Test on scrap first. When using water-based stains, pre-wetting the wood can raise the grain, which can be sanded down after the first coat.
Problem: Warping after installation.
Solution: Allow wood to acclimate to indoor humidity before cutting and finishing. Use balanced construction with backer boards or cross-bands and avoid installation in direct sunlight or damp areas without proper sealing.
Problem: Mounting fails—the artwork falls or shifts.
Solution: Reassess which wall anchors or fasteners you’re using. Whenever possible, attach to studs or use heavy-duty anchors for drywall. For long horizontal pieces, use multiple mounting points and a French cleat for balanced load distribution and stability.
Problem: Visible nail holes or imperfect joinery.
Solution: Fill nail holes or defects with color-matched putty, let dry, sand flush, and touch up finish. Consider incorporating shadow lines or intentional reveals to transform gaps into design features.
Example case: A homeowner experienced a small split in a reclaimed wood headboard after a season. The repair involved removing the piece, sanding the split area lightly, injecting thin CA glue into the crack, clamping overnight, and resealing with an exterior-grade finish. This approach aligns with standard woodworking repairs recommended by experts.
Transition: After addressing any issues and mounting securely, proper maintenance will help keep your wood artwork vibrant for years.
Maintenance and Care of Wood Wall Artwork
Routine care extends both the beauty and lifespan of your wood wall art. Follow these maintenance guidelines:
- Dust weekly with a soft, dry microfiber cloth or duster; avoid abrasive or chemical cleaners.
- For stubborn spots, gently wipe with a damp cloth and mild soap; dry immediately—avoid excess moisture.
- Annually inspect for loose hardware, cracks, or worn finishes; reapply protective top coats or spot-seal as needed.
- Avoid direct sunlight exposure to reduce fading; apply UV-resistant finishes if sunlight is unavoidable.
- Maintain indoor humidity around 35–55% to minimize wood movement. Use humidifiers or dehumidifiers as needed for balance.
- For outdoor or entryway signs, reseal every 12–24 months depending on exposure. Use exterior-rated sealers and rust-resistant hardware.
Limitations: Hand-applied finishes require periodic re-coating; painted surfaces may need touch-ups over time. Minor splits often can be repaired without full refinishing, but severe structural warping might necessitate component replacement.
Transition: Beyond ongoing care and repairs, sourcing sustainable materials reduces your environmental impact—here are practical tips.
Sustainable Wood Sourcing and Eco-Friendly Tips
Choosing responsible materials promotes environmental stewardship in your woodworking projects. Focus on reclaimed wood, certified sustainable sources, and low-VOC finishing products whenever possible.
Practical sourcing tips:
- Use reclaimed or salvaged wood from construction debris, pallets (ensure heat-treated and contaminant-free), and thrift stores to reduce demand for virgin timber.
- Buy certified sustainable wood from trusted organizations like the Forest Stewardship Council (FSC). See Forest Stewardship Council for certification and sourcing guidelines.
- Opt for low-VOC, water-based finishes and stains to minimize indoor air pollution during application and curing. A 2024 industry study highlights growing consumer preference for these eco-friendly products.
- Maximize material usage by repurposing offcuts and planning efficient nesting layouts when cutting plywood. Save scrap pieces for smaller accent projects or finish testing.
- Donate usable offcuts to local community workshops, schools, or maker spaces instead of discarding them.
Advanced sustainability strategies: For professional shops or sellers, maintain documented sourcing records and promote reclaimed or certified wood choices to your customers. Learn from leading industry sources such as the Woodworkers Guild of America for best practices and standards.
Transition into summary: You now have the knowledge of tools, style trends, DIY projects, finishing techniques, troubleshooting strategies, care tips, and sustainable sourcing. Here’s a concise conclusion to encourage your first build.
Conclusion: Wood artwork ideas for wall decor offer an affordable, creative way to inject warmth and personality into any room. Begin with simple pallet plank panels, then move toward more advanced routed and framed designs—all while prioritizing safety, finish quality, and secure mounting. Embrace reclaimed materials and low-VOC products to lessen environmental impact. Use these step-by-step projects as a roadmap to craft polished, long-lasting pieces. Ready to start? Gather your tools, select a project based on your skill level, follow the instructions, and enjoy the satisfaction of handmade wood art. Share your finished pieces or find further inspiration in related guides.
As a final practical tip: set aside a single weekend to complete a small starter project, document your steps with photos, and note any adjustments for next time—this builds confidence and creates a repeatable workflow for larger projects.
Try one project this weekend—start with the pallet plank geometric panel and refine your technique as you go. For painting integration and mixed-media explorations, see practical DIY painting techniques and for advanced hanging methods, check handmade wall piece craft techniques.
Frequently Asked Questions
What are some simple wood artwork ideas for beginners?
Start with a pallet plank geometric panel, a framed plank photo gallery, or a small routed welcome sign. These use basic cuts, glue, and brads, cost little if using reclaimed wood, and build foundational skills like sanding, staining, and mounting.
How does wood wall decor compare to canvas or metal art for home styling?
Wood wall decor adds warm texture and depth, complements rustic and boho styles, and can be sealed for durability; canvas is softer and lightweight, while metal offers a sleek, reflective look. Choose based on room lighting, humidity, and desired visual weight.
What tools are essential for creating wood artwork for walls?
Essentials: circular or miter saw, orbital sander, cordless drill/driver, clamps, brad nailer, basic hand tools, and safety gear (goggles, respirator, hearing protection). Optional: router and jigsaw for advanced shapes.
How do I safely mount wood artwork on different types of walls?
Use studs or heavy-duty anchors for drywall; toggle anchors for hollow walls; a french cleat for heavy pieces; masonry anchors for brick. Always match hardware to the piece’s weight and wall material, and level carefully during installation.
How much time does it usually take to complete a DIY wood wall decor project?
Beginner projects (small plank panels, frames) take 3–6 hours. Intermediate projects (layered panels, routed signs) take 6–12+ hours. Time varies with drying times, finishing coats, and complexity of joinery.
What should I do if my wood art piece has cracks or splits after finishing?
For small splits, inject thin CA glue or wood glue into the crack and clamp until cured; sand and spot-fill if needed. For larger structural splits, replace affected pieces or reinforce with splines or backing braces before refinishing.
How can I ensure the quality and longevity of my wood wall decor?
Use properly dried lumber, balanced construction, adequate sealing (appropriate varnish or polyurethane), correct mounting hardware, and stable indoor humidity control to reduce warping and extend longevity.
What are eco-friendly options for sourcing wood for DIY art projects?
Choose reclaimed or salvaged wood, buy FSC-certified lumber, use offcuts efficiently, and select low-VOC finishes. Donate or repurpose scraps to reduce waste and support sustainable woodworking practices.


