

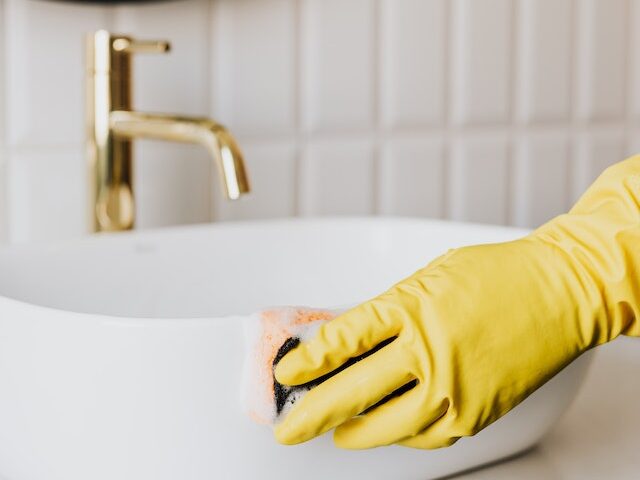
Bathroom sinks are essential fixtures in bathrooms, used for washing hands, brushing teeth, and performing other hygiene tasks. There are various types of bathroom sinks, including pedestal sinks, wall-mounted sinks, vanity sinks, and vessel sinks. The choice of a bathroom sink depends on several factors such as the size of the bathroom, personal preferences, and budget. When it comes to maintenance, regular cleaning of your bathroom sink is important to keep it looking its best and prevent the buildup of bacteria and germs. Common methods to clean bathroom sinks include using soap and water, a cleaning solution, or a mixture of baking soda and vinegar. Additionally, cleaning the drain and P-trap under the sink regularly can prevent clogs and unpleasant odors.
Drain slow, or stubborn buildup? Consider The Best Bathroom Vanity Plumbing Tricks for a seamless solution.
If you have any issues with your bathroom sink, such as a clogged drain or leaky faucet, it is best to address the problem promptly to prevent further damage or health hazards. A plumbing professional can provide expert advice and assistance, if necessary.
How to clean bathroom sink drain?
Cleaning a bathroom sink drain involves the following steps:
1. Remove the stopper: Lift the stopper out of the drain to access the clog.
2. Use a plunger: Fill the sink with enough water to cover the plunger cup and use a plunger to create suction and dislodge the clog.
3. Try a bent wire hanger: Straighten a wire hanger and bend one end into a hook. Insert the hook into the drain and try to pull out the clog.
4. Use boiling water: Boil a pot of water and slowly pour it down the drain to help break up and flush out the clog.
5. Try a chemical cleaner: If the clog persists, try using a commercial drain cleaner according to the manufacturer’s instructions.
Note: Avoid using chemical drain cleaners regularly, as they can damage pipes and be harmful to the environment. If the clog is too persistent, consider calling a professional plumber.
How to clean p-trap under bathroom sink?
Cleaning the P-trap under a bathroom sink involves the following steps:
1. Turn off the water supply: Turn off the water supply valves under the sink to prevent water from flowing into the pipes.
2. Place a bucket under the P-trap: Place a bucket under the P-trap to catch any water or debris that may spill out.
3. Loosen the nuts: Locate the nuts that secure the P-trap to the drain and the tailpiece and use a wrench to loosen them.
4. Remove the P-trap: Carefully remove the P-trap and empty any debris or water into the bucket.
5. Clean the P-trap: Clean the P-trap with soap and water, or a cleaning solution if necessary.
6. Reinstall the P-trap: Replace the P-trap with the drain, tighten the nuts, and secure them in place.
7. Turn on the water supply: Turn on the water supply valves under the sink and check for leaks.
Cleaning the P-trap under a bathroom sink is a simple task that can help keep your plumbing system running smoothly and prevent unpleasant odors from developing. If you’re unsure about any aspect of the process, consider seeking the advice of a plumbing professional.
How to remove bathroom sink stopper to clean?
Removing a bathroom sink stopper to clean it involves the following steps:
1. Locate the mechanism: The mechanism for removing the stopper can usually be found under the sink or at the back of the drain.
2. Remove the stopper: Depending on the type of stopper, you may be able to simply lift it out, or you may need to twist or unscrew it to remove it.
3. Clean the stopper: Clean the stopper with soap and water, or a cleaning solution if necessary.
4. Reinstall the stopper: Replace the stopper into the drain and secure it in place.
How often should you clean your bathroom sink?
The frequency of cleaning your bathroom sink depends on several factors such as usage, location, and personal hygiene habits. A general guideline is to clean your bathroom sink at least once a week, or more frequently if necessary.
Here are some signs that indicate it’s time to clean your bathroom sink:
1. Visible dirt and grime: If you can see dirt, grime, or soap scum buildup on the sink, it’s time to clean it.
2. Foul odors: If you notice an unpleasant odor coming from the sink, it may be a sign that it needs to be cleaned.
3. Stains: If you see stains on the sink, it’s time to clean and disinfect it.
By regularly cleaning your bathroom sink, you can maintain its appearance and prevent the buildup of bacteria and germs.
How to clean bathroom sink drain with baking soda and vinegar?
Cleaning a bathroom sink drain with baking soda and vinegar involves the following steps:
1. Pour baking soda down the drain: Pour a cup of baking soda down the drain, then add a cup of white vinegar.
2. Wait for the reaction: Allow the mixture to sit for several minutes to allow the reaction between the baking soda and vinegar to break down the clog.
3. Flush with hot water: After a few minutes, flush the drain with hot water to clear out the clog.
4. Repeat if necessary: If the clog is not completely cleared, repeat the process.
Using baking soda and vinegar is a natural and effective way to clean your bathroom sink drain. However, if the clog is too persistent, you may need to use a plunger or call a professional plumber for assistance.
How to remove bathroom sink drain to clean?
Removing a bathroom sink drain to clean it involves the following steps:
1. Turn off the water supply: Turn off the water supply valves under the sink to prevent water from flowing into the pipes.
2. Remove the stopper: Lift the stopper out of the drain to access the clog.
3. Loosen the nut: Locate the nut under the sink that secures the drain to the sink and use a wrench to loosen it.
4. Remove the drain: Carefully lift the drain out of the sink, taking care not to damage the gasket or other parts.
5. Clean the drain: Clean the drain and surrounding area with soap and water, or a cleaning solution if necessary.
6. Reinstall the drain: Replace the drain back into the sink, secure the nut, and replace the stopper.
7. Turn on the water supply: Turn on the water supply valves under the sink and check for leaks.
Note: The exact steps for removing a bathroom sink drain may vary depending on the type of drain and sink you have. If you’re unsure how to remove your specific drain, consult the manufacturer’s instructions or a plumbing professional for guidance.
Once your sink sparkles, why not Renovate Your Bathroom in 7 Easy Steps?
