

Here are 7 helpful tricks to making the most of your bathroom sink:
- Install a sink caddy: A sink caddy can help you keep your sink area organized and free of clutter.
- Use a sink skirt: A sink skirt can provide additional storage space and hide unsightly pipes and cleaning supplies.
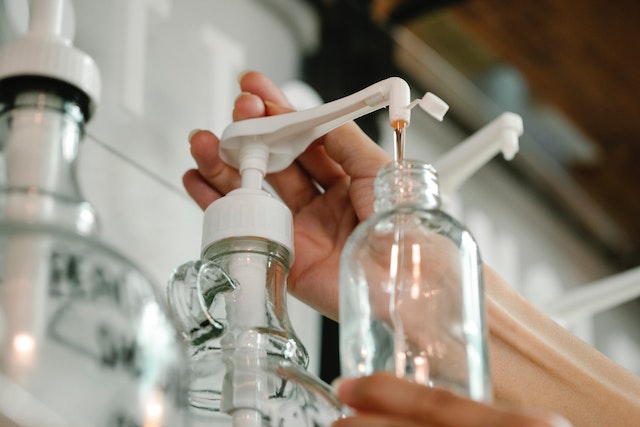
- Add a soap dispenser: A soap dispenser can help reduce soap clutter and make it easier to keep your sink area clean. Keeping things spotless? Learn How to Clean Bathroom Sinks Like an Expert for professional advice.
- Install a wall-mounted sink: A wall-mounted sink can help free up valuable counter space and create a sleek, modern look.
- Upgrade to a vessel sink: A vessel sink sits on top of the counter, creating a stylish focal point in your bathroom.
- Add a mirror: A mirror above your sink can help to reflect light and make your bathroom feel larger and more spacious.
- Upgrade your faucet: A new faucet can give your bathroom sink a fresh, updated look and improve functionality.
By following these tips, you can maximize the space and functionality of your bathroom sink, making it a more practical and stylish part of your bathroom.
For an even more functional setup, discover How to Get the Most Out of Your Bathroom Vanity.
Why should I start using a sink caddy?
There are several reasons why you should start using a sink caddy:
Organization: A sink caddy provides a designated space for your cleaning supplies and personal care items, helping to keep your sink area organized and clutter-free.
Space-saving: By keeping items elevated and off the countertop, a sink caddy can help to free up valuable counter space.
Easy access: A sink caddy makes it easy to find and access the items you need, reducing the time and effort required to clean or groom.
Improved hygiene: By keeping your cleaning supplies contained and off the countertop, a sink caddy can help to reduce the spread of germs and bacteria.
Aesthetics: A sink caddy can help to improve the appearance of your bathroom by creating a clean and organized look.
By using a sink caddy, you can enjoy a more organized and functional sink area, while also keeping your bathroom looking clean and stylish.
How to make sink caddy suction cups stick better?
Here are some tips to make sink caddy suction cups stick better:
1. Clean the surface: Make sure the area where you want to attach the suction cups is clean and free of any debris or soap scum. This will ensure a good, strong bond.
2. Wet the surface: Wetting the surface before applying the suction cups can improve the grip.
3. Push down firmly: When attaching the suction cups, make sure to push down firmly to create a strong seal.
4. Avoid extreme temperatures: Suction cups may lose their grip in extremely hot or cold temperatures. Avoid exposing them to extreme temperatures or direct sunlight.
5. Replace suction cups: Over time, suction cups can lose their grip and become less effective. If your sink caddy suction cups are not sticking well, consider replacing them with fresh, new suction cups.
By following these tips, you can help improve the grip of your sink caddy suction cups, ensuring a strong and secure hold.
How to make a foaming soap dispenser?
Here is how to make a foaming soap dispenser:
Materials:
* Empty foam soap dispenser
* Liquid soap
* Water
* Funnel
* Measuring cup
Instructions:
1. Clean the dispenser: Make sure the dispenser is clean and free of any residue from previous use.
2. Fill with water: Using a measuring cup and funnel, fill the dispenser about 1/3 of the way with water.
3. Add liquid soap: Add an equal amount of liquid soap to the dispenser. For example, if you filled the dispenser with 1/3 cup of water, add 1/3 cup of liquid soap.
4. Shake gently: Close the dispenser and shake gently to mix the water and soap.
5. Test the dispenser: Squeeze a small amount of soap into your hand to see if it is foaming properly. If it is too thin, add a small amount of water; if it is too thick, add a small amount of soap.
6. Use: When you are satisfied with the consistency of the foam, the dispenser is ready to use.
By following these steps, you can easily make a foaming soap dispenser, using your favorite liquid soap and water. The dispenser is not only convenient and easy to use but also a great way to reduce soap waste, as foam soap requires less soap to achieve the same level of cleaning.
How to install a wall-mounted sink?
Here is a general guide for how to install a wall-mounted sink:
Materials:
* Wall-mounted sink
* Mounting hardware (bolts and nuts, wall brackets, etc.)
* Wall anchors
* Silicone sealant
* Plumbers putty
* Adjustable wrench
* Drill
* Level
* Stud finder
* Tape measure
* Drywall saw or hole saw
Instructions:
1. Find the wall studs: Use a stud finder to locate the wall studs in the area where you want to install the sink.
2. Measure and mark the sink location: Measure and mark the height and placement of the sink on the wall, making sure it is level.
3. Cut the hole: Use a drywall saw or hole saw to cut a hole in the wall, following the markings.
4. Attach wall brackets: Install the wall brackets to the wall using the wall anchors.
5. Apply silicone sealant: Apply a bead of silicone sealant around the back of the sink to help create a watertight seal.
6. Place the sink: Place the sink on the wall brackets and tighten the bolts and nuts to secure it in place.
7. Connect the plumbing: Connect the plumbing for the sink, making sure to use plumbers putty to create a water-tight seal around the drain.
8. Test the sink: Turn on the water and check for leaks. Make any necessary adjustments to ensure a tight, watertight connection.
By following these steps, you can successfully install a wall-mounted sink in your bathroom. It is recommended to seek professional help if you are unsure about any aspect of the installation process.
What is a vessel sink?
A vessel sink is a type of sink that sits on top of the counter, rather than being recessed or semi-recessed into the counter. Vessel sinks are commonly made of materials such as glass, ceramic, stone, or copper and are often shaped like bowls or other unique designs. They are commonly used in bathroom vanity tops, but can also be used in other areas such as kitchens or wet bars.
One of the main benefits of a vessel sink is that they offer a distinct, decorative element to a bathroom or kitchen. They come in a variety of shapes, sizes, and colors, making it easy to find one that matches the aesthetic of your space. Additionally, because they sit on top of the counter, they can be easier to clean than traditional sink designs.
However, it is important to keep in mind that a vessel sink requires a special type of faucet, as the faucet must be tall enough to reach the sink while still fitting under the counter or other surfaces. Installing a vessel sink also requires a different installation process compared to a traditional sink.

How to install a vessel sink?
Installing a vessel sink involves the following steps:
1. Prepare the vanity top: Cut a hole in the vanity top that is the same size as the sink rim.
2. Install the sink drain: Install the sink drain in the drain hole of the sink and tighten the nut to secure it in place.
3. Connect the sink to the drain pipe: Connect the sink drain to the drain pipe under the vanity using a rubber gasket and a mounting ring.
4. Apply silicone sealant: Apply silicone sealant around the sink rim and place it onto the vanity top.
5. Connect the plumbing: Connect the hot and cold water supply lines to the sink faucet using flexible hoses.
6. Install the faucet: Install the faucet onto the sink according to the manufacturer’s instructions.
7. Test the sink: Turn on the water and check for leaks.
Note: This is a general guide and the exact steps may vary depending on the sink, drain, and faucet you are using. Always follow the manufacturer’s instructions and local plumbing codes.
How to hang a mirror in the bathroom?
To hang a mirror in the bathroom:
Choose the right hanging hardware. Make sure the hardware is appropriate for the weight and size of your mirror and appropriate for the type of wall you’re hanging it on.
Locate the studs in the wall. Use a stud finder to locate the wooden beams behind the wall.
Mark the studs on the wall. Use a pencil to mark the location of the studs where you plan to hang the mirror.
Attach the hanging hardware to the back of the mirror. Follow the manufacturer’s instructions for attaching the hanging hardware to the back of the mirror.
Hold the mirror up to the wall and make sure it’s level. Use a level to make sure the mirror is straight.
Secure the hanging hardware to the studs. Make sure the hardware is securely attached to the studs in the wall.
Hang the mirror on the hardware. Make sure the mirror is securely in place on the hardware and adjust as necessary.
Note: If the wall is not made of wood or there are no studs, use wall anchors instead of hanging hardware.
How to install a bathroom faucet?
Installing a bathroom faucet involves the following steps:
1. Turn off the water supply: Turn off the water supply valves under the sink to prevent water from flowing into the pipes.
2. Remove the old faucet: Unscrew the nuts that secure the old faucet to the sink and remove it.
3. Install the mounting hardware: Install the mounting hardware that came with the new faucet according to the manufacturer’s instructions.
4. Attach the water supply lines: Connect the hot and cold water supply lines to the faucet using the flexible hoses.
5. Install the faucet: Place the faucet onto the sink and secure it with the nuts.
6. Connect the drain: Connect the drain assembly to the faucet and sink.
7. Turn on the water supply: Turn on the water supply valves under the sink and check for leaks.
Note: This is a general guide and the exact steps may vary depending on the faucet and sink you are using. Always follow the manufacturer’s instructions and local plumbing codes.
