

A kitchen backsplash is a material or feature that is installed on the wall behind the stove, sink, or countertops to protect the wall from spills, splashes, and other kitchen messes. It can also serve as a decorative element that can enhance the overall look of a kitchen.
Common types of kitchen backsplashes include tile, glass, stone, metal, and painted or wallpapered surfaces. Some popular backsplash materials are ceramic tiles, porcelain, glass, marble, granite, and stainless steel. The most popular backsplash can vary depending on the current trend, personal preference, and location. Some people like to use mosaic tile backsplash which can be used to create a pattern or image, while others prefer a more traditional subway tile look.
What is a backsplash in kitchen?
A backsplash in a kitchen is a vertical surface that is installed behind a stove, sink, or countertop to protect the wall from splashes, spills, and stains. Backsplashes can be made from a variety of materials such as tile, stone, glass, metal, and even paint. They come in many different styles, colors, and patterns, which can be used to complement the overall design of the kitchen.
A backsplash can serve not only a practical purpose but also an aesthetic one, as it can add visual interest to a kitchen. They can be used to create a focal point, coordinate with the countertop, or complement the cabinets.
Tile is one of the most common materials used for kitchen backsplashes. They come in a wide range of materials, such as ceramic, porcelain, or natural stone, and in a variety of sizes, shapes, and colors. They are easy to clean and maintain and are a durable option that can last for many years.
Another option is a glass backsplash. it gives an elegant and modern look to the kitchen, they can be customized to match the kitchen’s décor and can be easy to clean.
When choosing a backsplash, it’s important to consider the overall style of the kitchen, the material’s durability and maintenance requirements, and the budget. It’s also a good idea to look at different options and choose the one that will work best for you.
What is the most popular backsplash for kitchen?
Tile is currently one of the most popular materials used for kitchen backsplashes. There are many reasons for this popularity:
Versatility:
Tiles come in a wide range of materials, such as ceramic, porcelain, or natural stone, and in a variety of sizes, shapes, and colors. This allows for a lot of creative options in terms of design and style.
Durability:
Tiles are durable and can withstand heat, moisture, and spills. They are easy to clean and maintain and can last for many years.
Cost-effective:
Tiles are generally less expensive than other materials, such as stone or glass.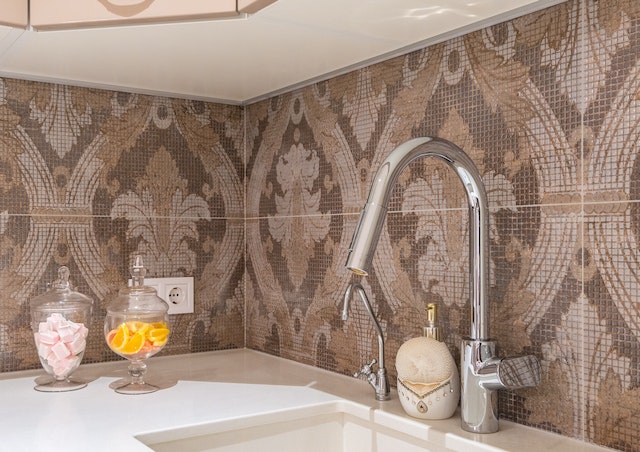
Easy to Install:
Tiles are relatively easy to install, which makes them a popular choice for DIY projects.
Some of the most popular types of tile for kitchen backsplashes include ceramic, porcelain, glass, metal tile, subway tile, and mosaic tile. Subway tile is a classic option that has been popular for many years and works well with many different kitchen styles. Mosaic tile is a popular choice for those looking for a unique and decorative backsplash.
It is important to keep in mind that this can vary depending on the location, design trends, and personal preferences. Other materials such as natural stone, stainless steel, and even mirrors are also becoming increasingly popular as backsplash options.
How to install kitchen backsplash?
Installing a kitchen backsplash can be a relatively easy DIY project that can add both style and function to your kitchen. Here are the basic steps for installing a tile backsplash:
Gather the necessary materials: You will need tile, adhesive, grout, a tile cutter or wet saw, a notched trowel, tile spacers, a rubber float, a sponge, and a bucket of water.
Measure and mark the area: Measure the area where the backsplash will be installed and mark it with a pencil. This will help you determine the number of tiles you need and how to lay out the pattern.
Prepare the surface: Clean the wall surface where the backsplash will be installed, making sure it is free of dirt, grease, and any other debris.
Apply the adhesive: Use the notched trowel to apply the adhesive to the wall, spreading it evenly in a thin layer.
Install the tiles: Start at the bottom of the backsplash and press the tiles onto the adhesive, making sure they are level and flush with each other. Use tile spacers to ensure even spacing between the tiles.
Cut the tiles to fit: Use a tile cutter or wet saw to cut any tiles that need to be fit around outlets or other obstacles.
Allow the adhesive to dry: Allow the adhesive to dry completely before continuing to the next step.
Apply the grout: Mix the grout according to the manufacturer’s instructions and use a rubber float to press it into the gaps between the tiles. Be sure to wipe off any excess grout with a damp sponge before it dries.
Allow the grout to dry: Allow the grout to dry completely, usually 24 hours, before using the kitchen.
Seal the grout: Once the grout is completely dry, it is important to seal the grout to protect it from stains and moisture.
It is important to note that the process may be different depending on the type of tile you use, the size and shape of the tile, and the condition of the wall surface. If you are not sure about the process, it is best to consult a professional or refer to the manufacturer’s instructions.
How to remove kitchen backsplash?
Removing a kitchen backsplash can be a relatively simple process, but it does require some time and effort. Here are the basic steps for removing a tile backsplash:
Gather the necessary tools:
You will need a hammer, chisel, putty knife, screwdriver, and a wet saw or tile cutter. You may also want to wear safety glasses and gloves to protect your hands and eyes.
Clear the area:
Remove any items that are on the countertops and clear the area around the backsplash. This will give you room to work and make the process easier.
Remove any outlets or switch plates:
Use a screwdriver to remove any outlets or switch plates that are located on the backsplash. Be sure to turn off the power to the area before doing so.
Score the grout lines:
Use a hammer and chisel to score the grout lines between the tiles. This will make it easier to remove the tiles.
Remove the tiles:
Starting at the top of the backsplash, use the chisel or putty knife to gently pry the tiles off the wall. Be careful not to damage the drywall or other surfaces as you remove the tiles.
Remove the adhesive:
Once all of the tiles have been removed, use the putty knife to scrape off any remaining adhesive.
Repair and patch the wall:
If the wall has any damage or holes, use spackling or joint compound to repair and smooth out the surface. Allow the spackling to dry completely before painting or installing new tile.
Clean the surface:
Clean the surface of the wall thoroughly with mild detergent and water to remove any remaining adhesive or grout.
It is important to note that if the backsplash is made of a different material than tile, the process will be a bit different. If the backsplash is made of glass, metal, or stone, you may need to hire a professional to remove it as it can be more challenging and may require special tools.
